
Your First Resin Printer
Scope, Budget, and WorkSpace
Updated 04/30.2025
As makers, we share what we research, test, and use. If you decide to purchase anything we mention using our referral links, we may get a small commission at no cost to you. If you’d like to learn more, visit our affiliate policy.
To start, this post is meant to be a starting point for anyone navigating their first resin printer, This is not a sponsored post, the brands mentioned are based on my own and trusted peer experiences. Cool? Cool.
And now on with the show. Your resin printer: Scope, Budget, and WorkSpace.
Update: 1/30/2025: Its hard to go wrong with the current line of offerings. This generation of new printers has a lot of built-in quality of life upgrades like auto bed leveling and heated chambers. So while the recommendations below are a few generations behind - the considerations for any new printer out there will remain the same. What to think about: budget, scope and workspace.
Find what fits your needs currently. It’s hard to predict how much you’ll print so start small if you can. After you get a good understanding of the basics, you can always upgrade down the line because your needs may change.
Jump to TLDR: Equipment List

(Credit - Pexels BreakingPic)
My Resin Printing experiences
As a propmaker, designer and entrepeneur.
In 2014, the shop I worked for got the bid for a project from Gillette. We were responsible for making Marvel hero-themed razors for a tie-in promotion (See attached. I hand-painted hundreds of razor blade props.) It was my first time using the Form 1 resin printer as part of my workflow. Finally, we had the “rapid prototyper” machine from Jurassic Park 3 except, with less movie magic, and more smelly chemical magic. As my first touch point with resin printing, I was astonished by the quality!
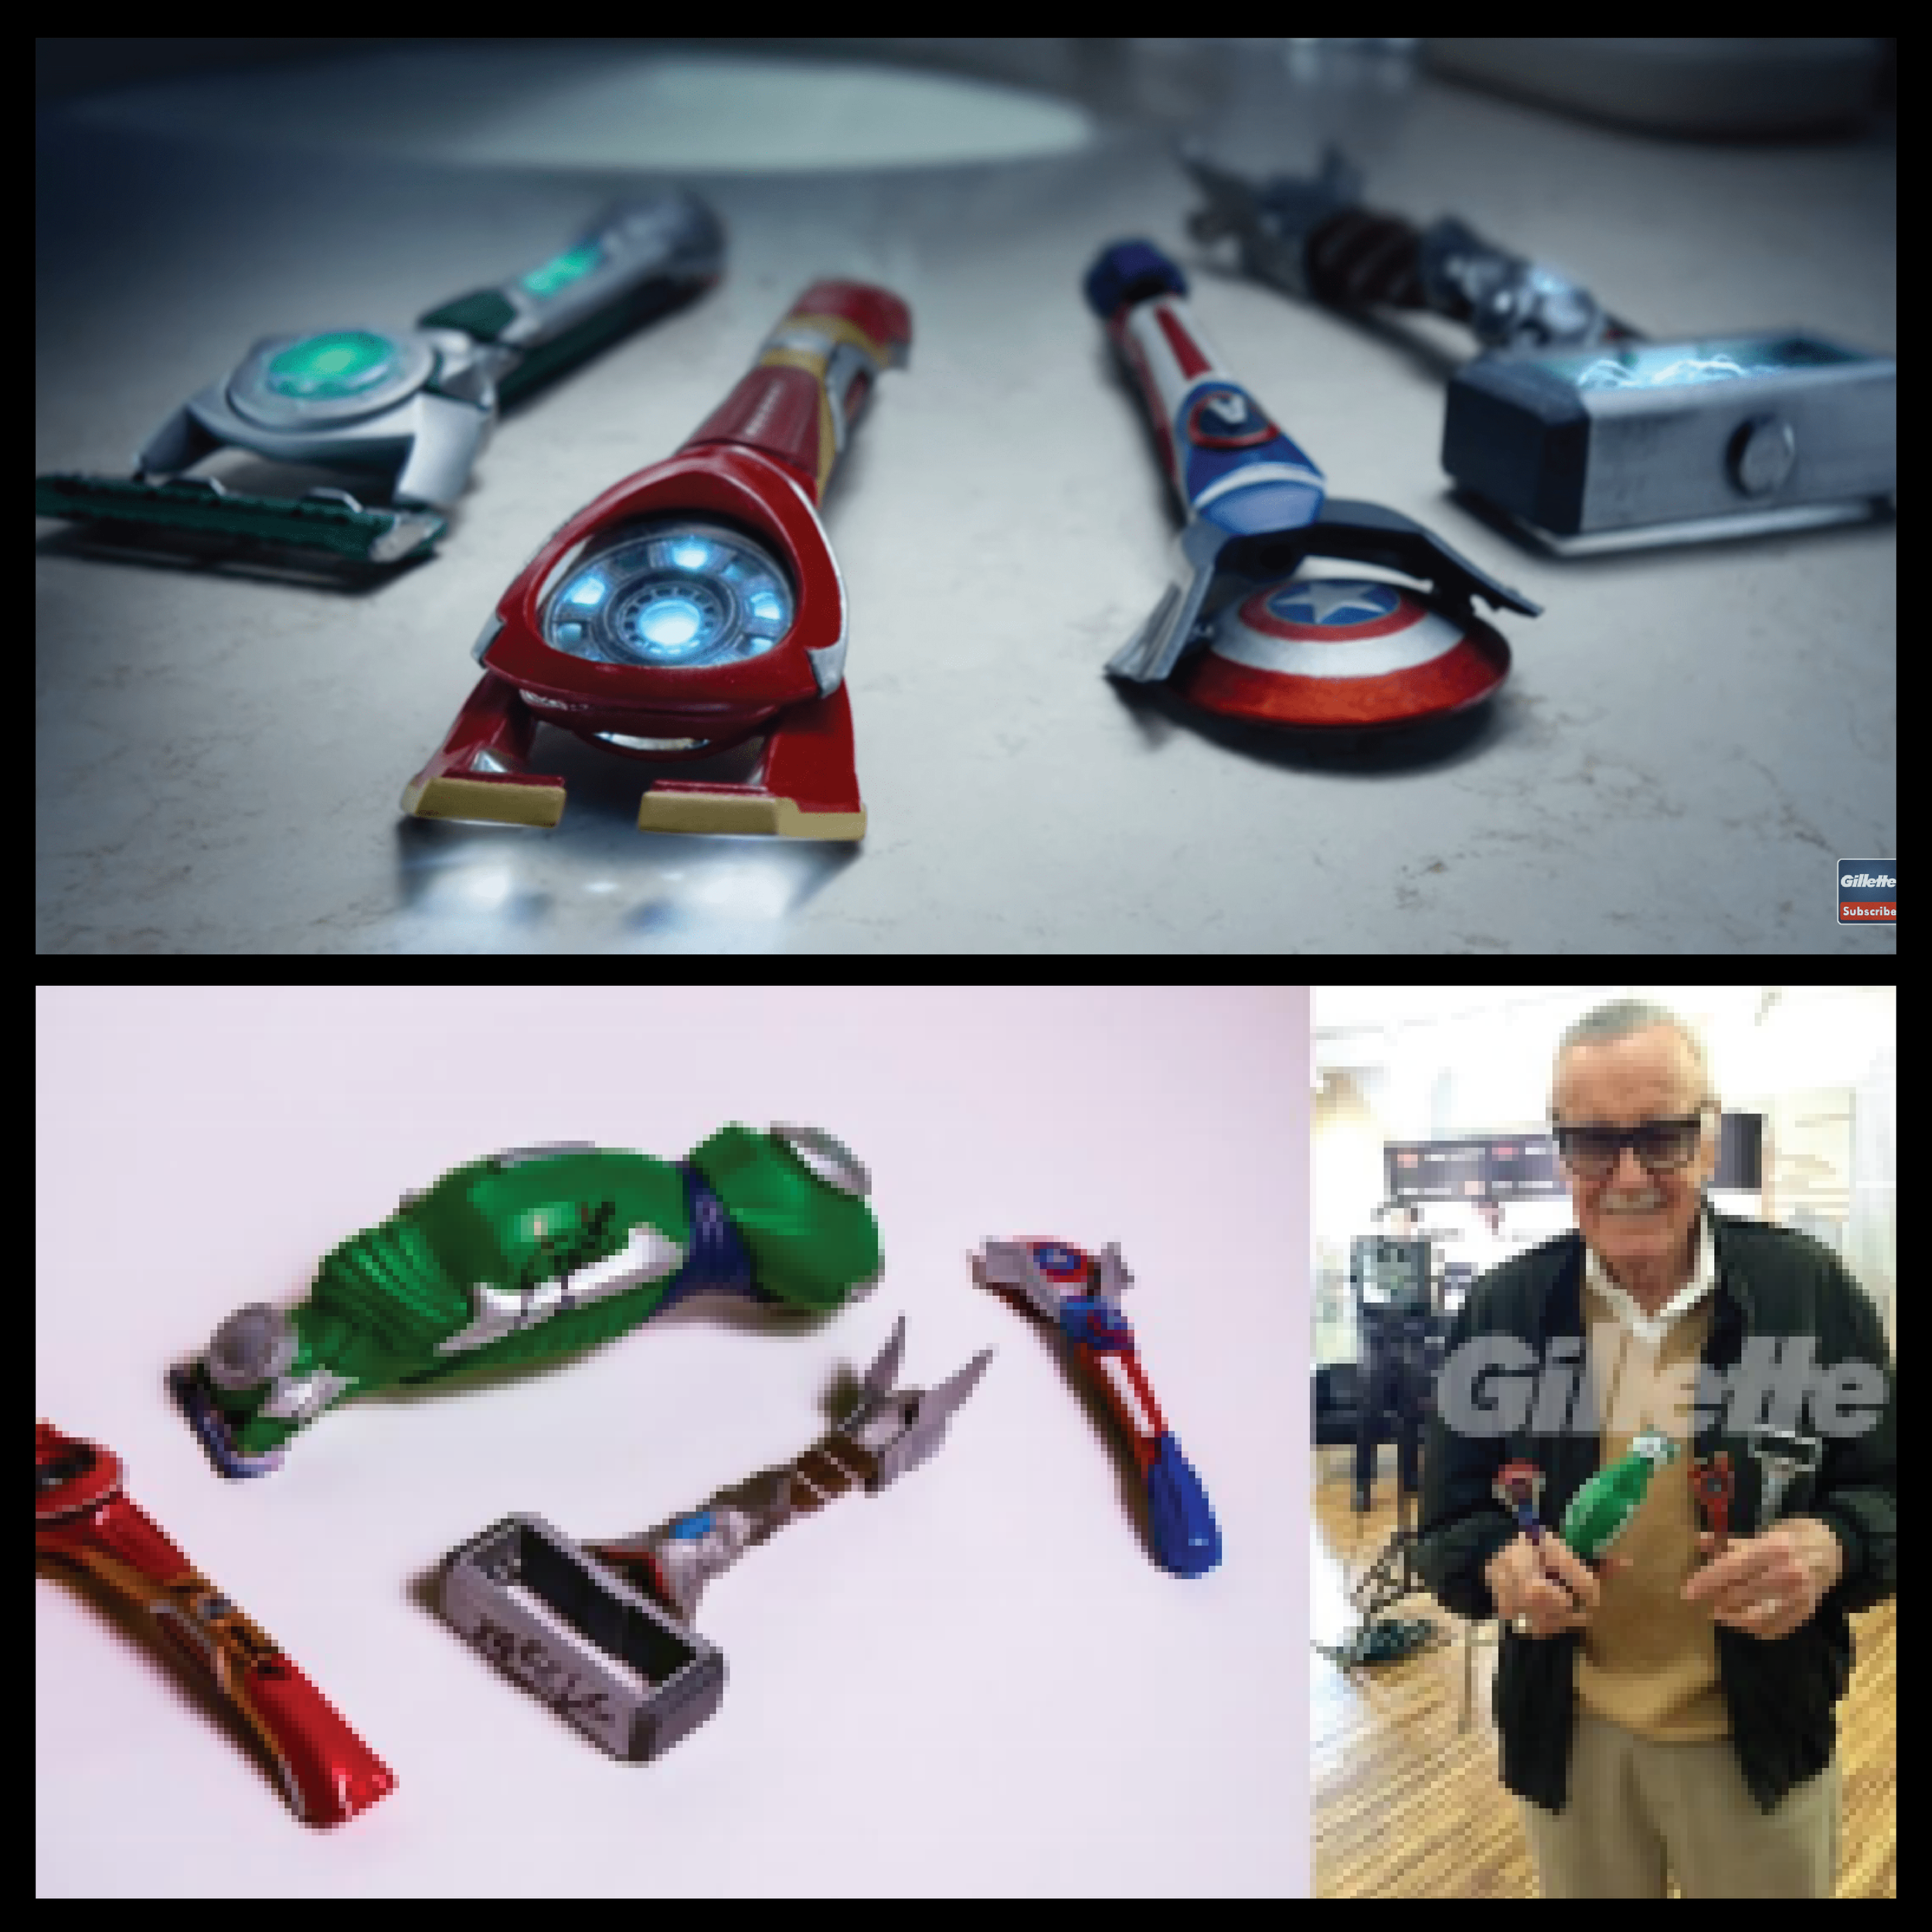
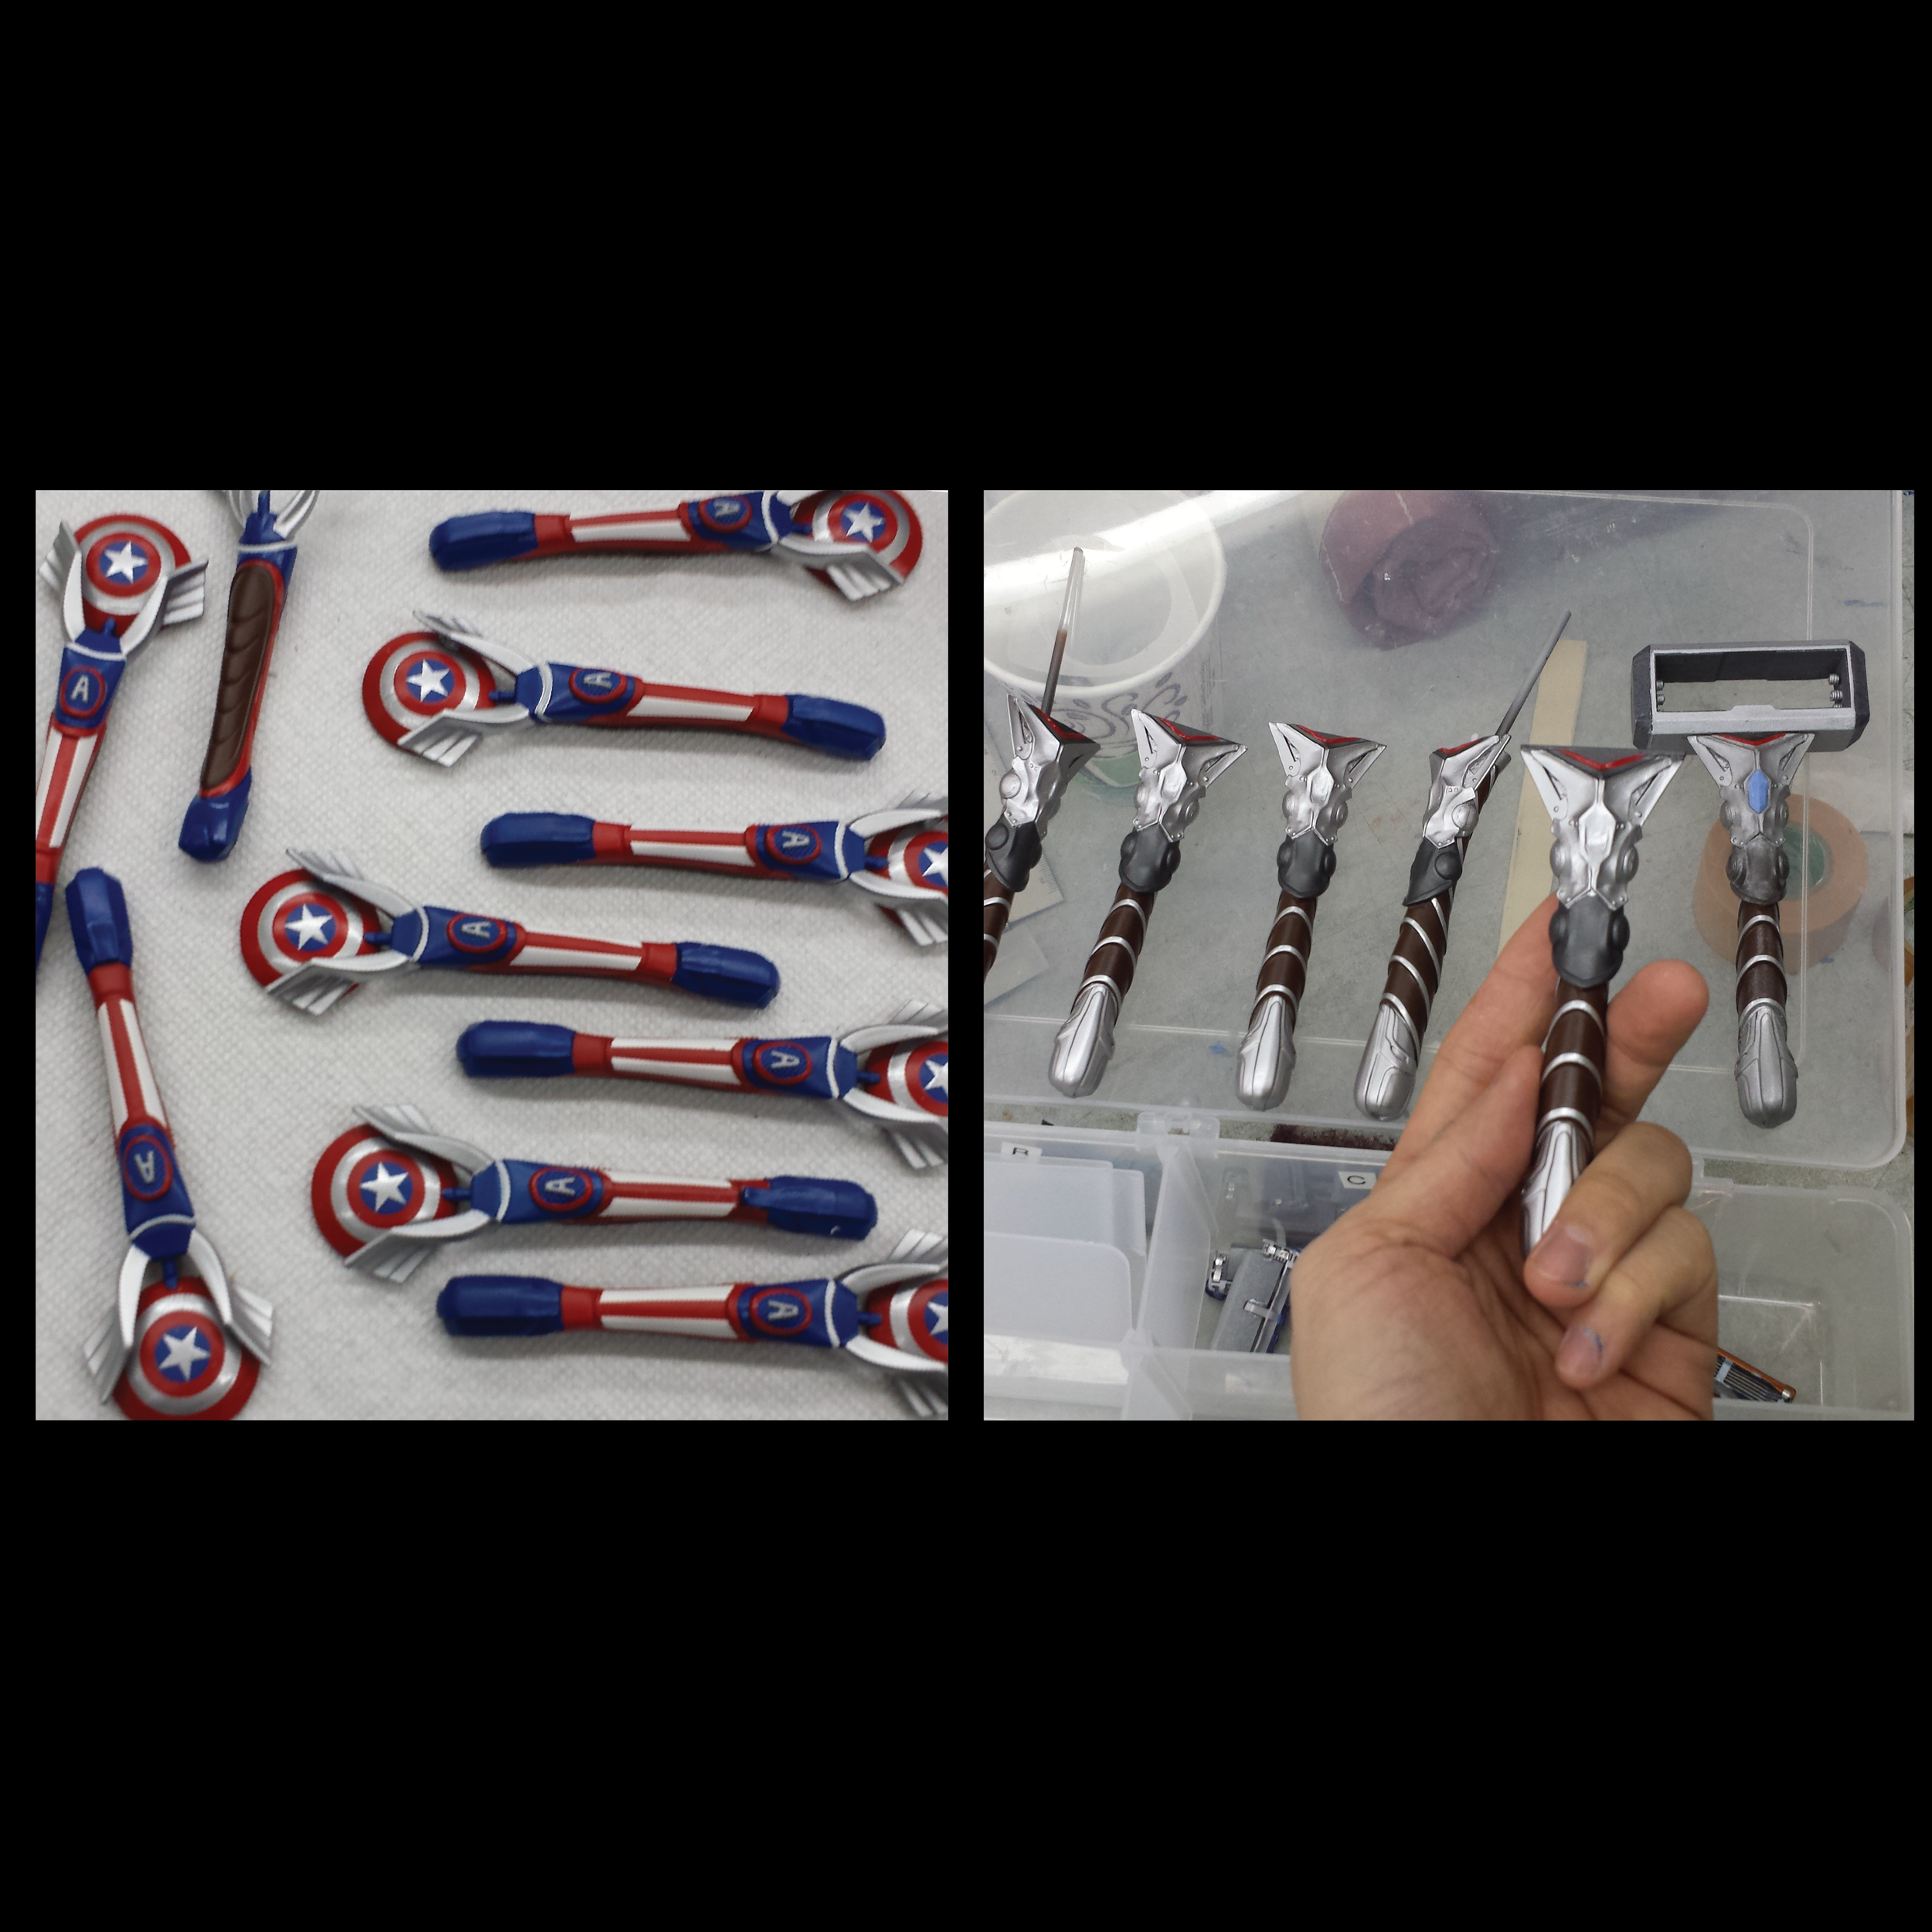
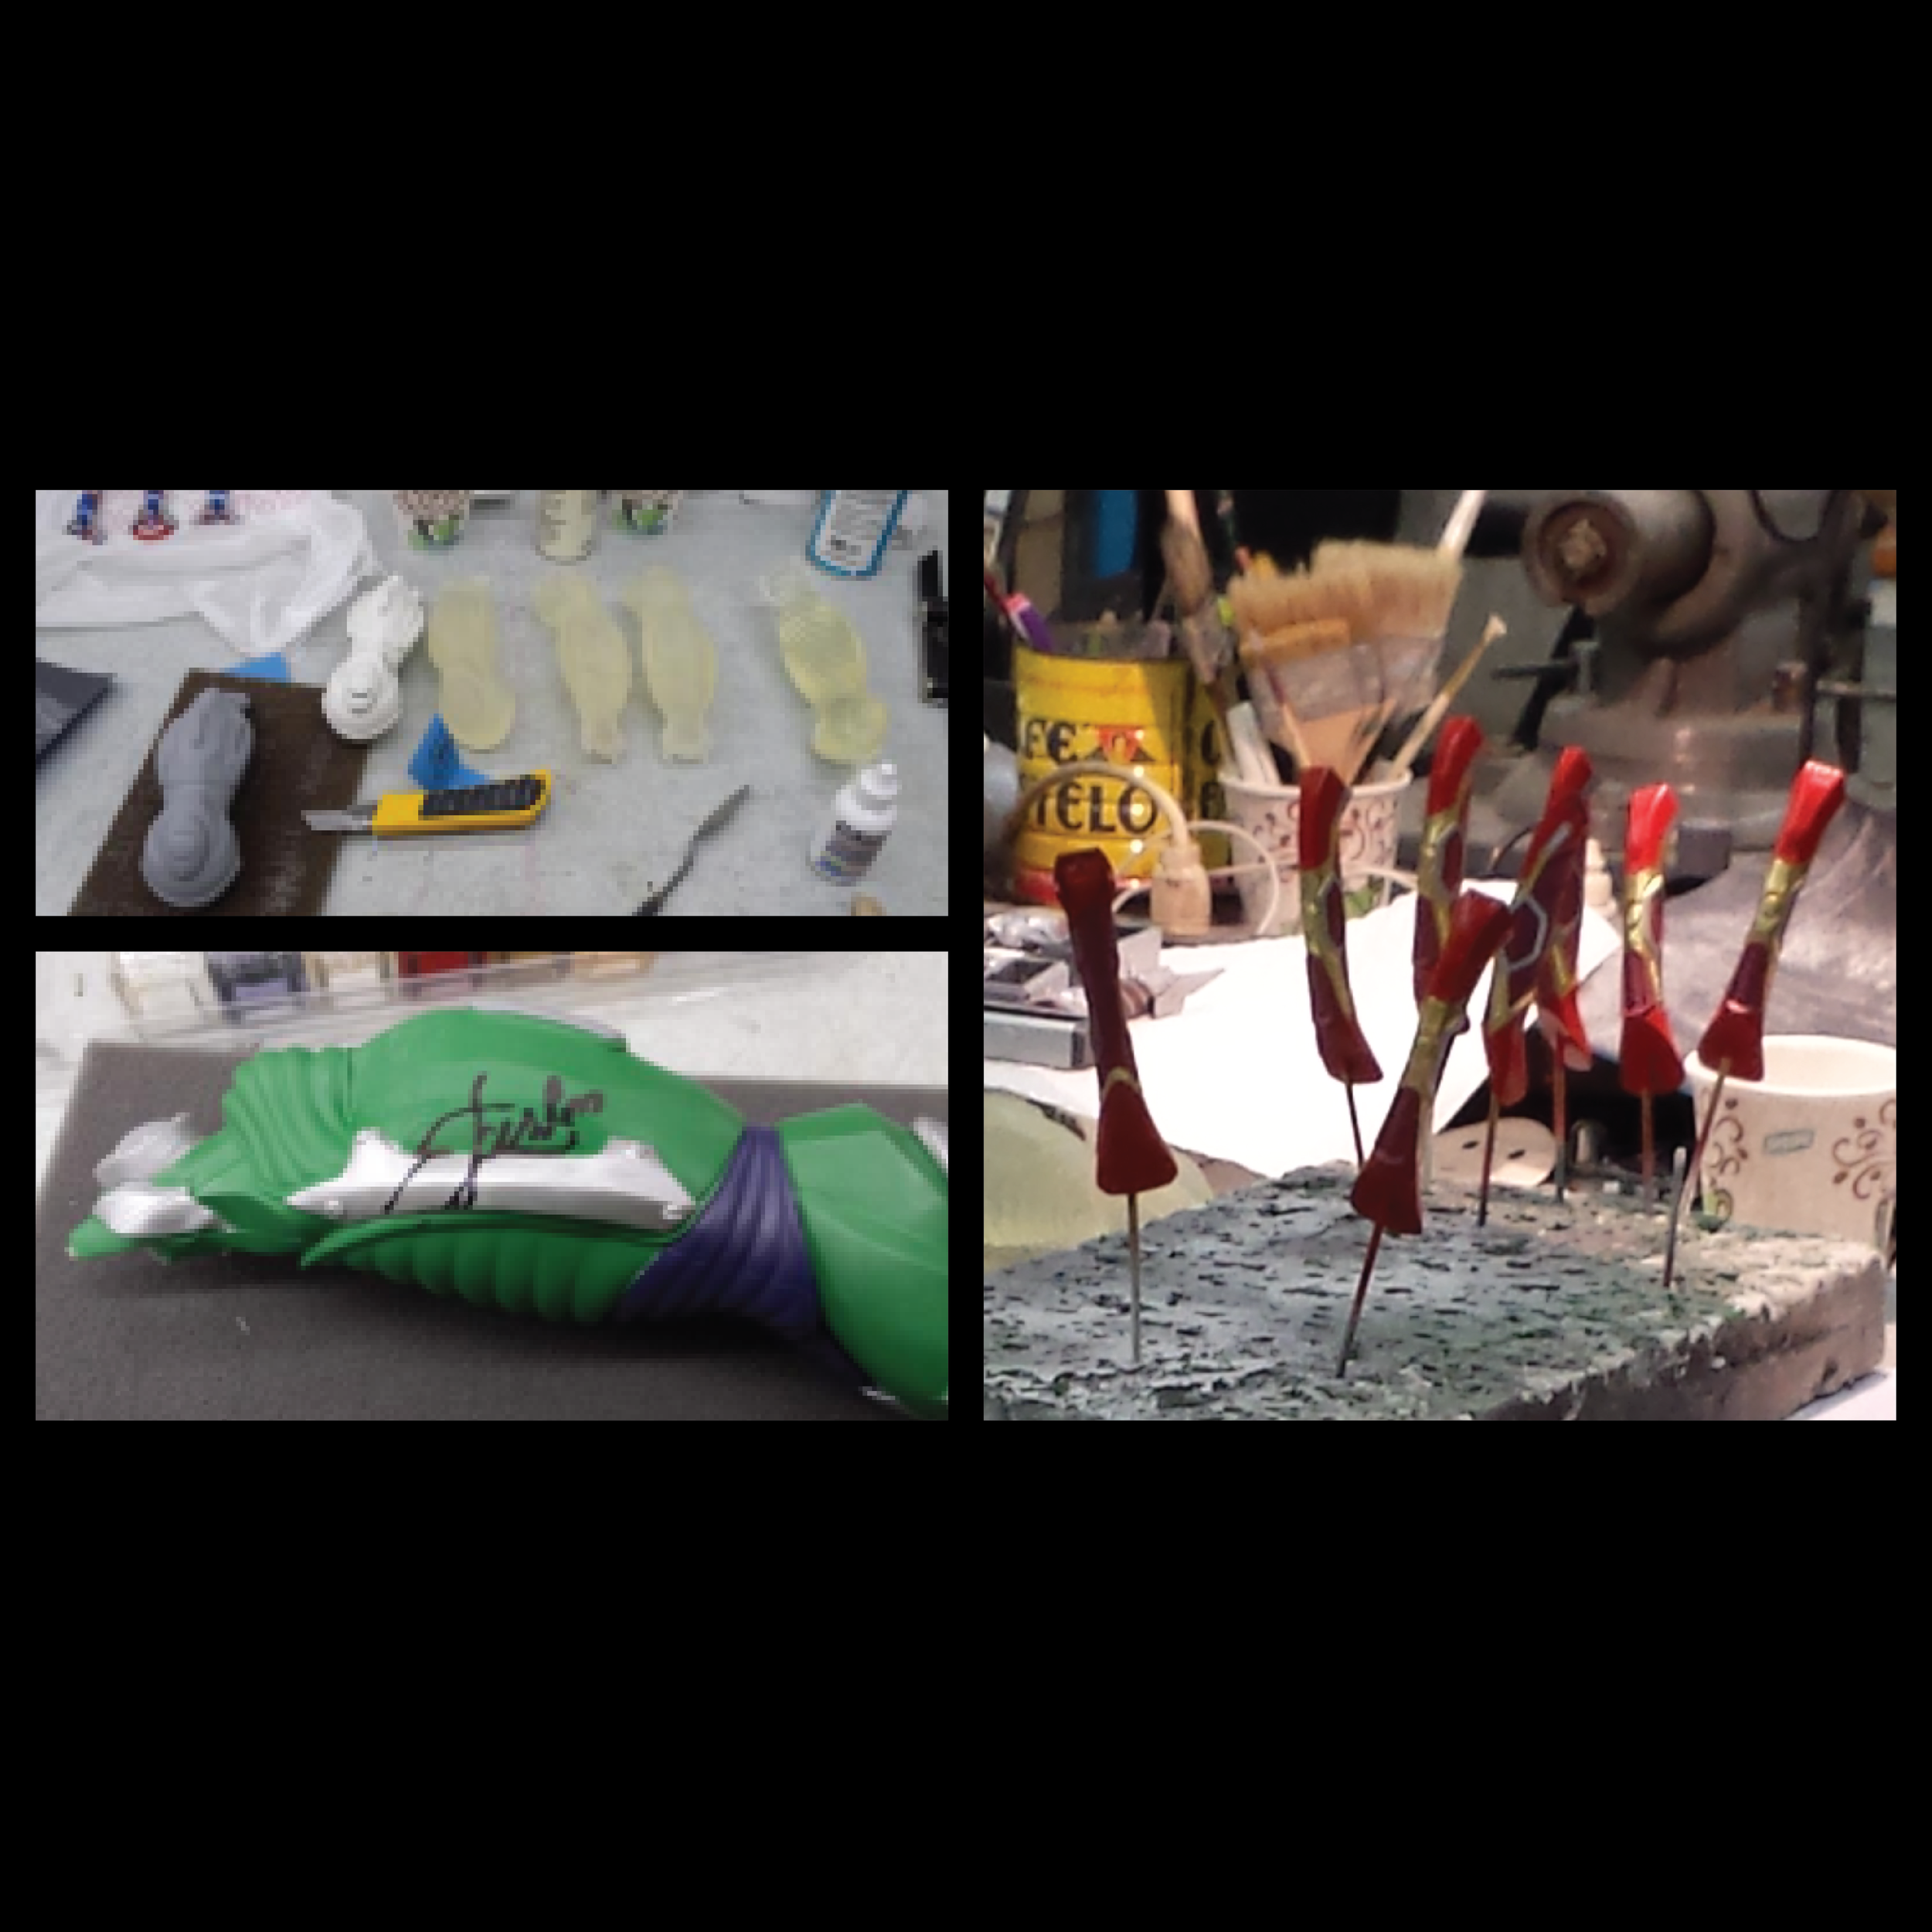
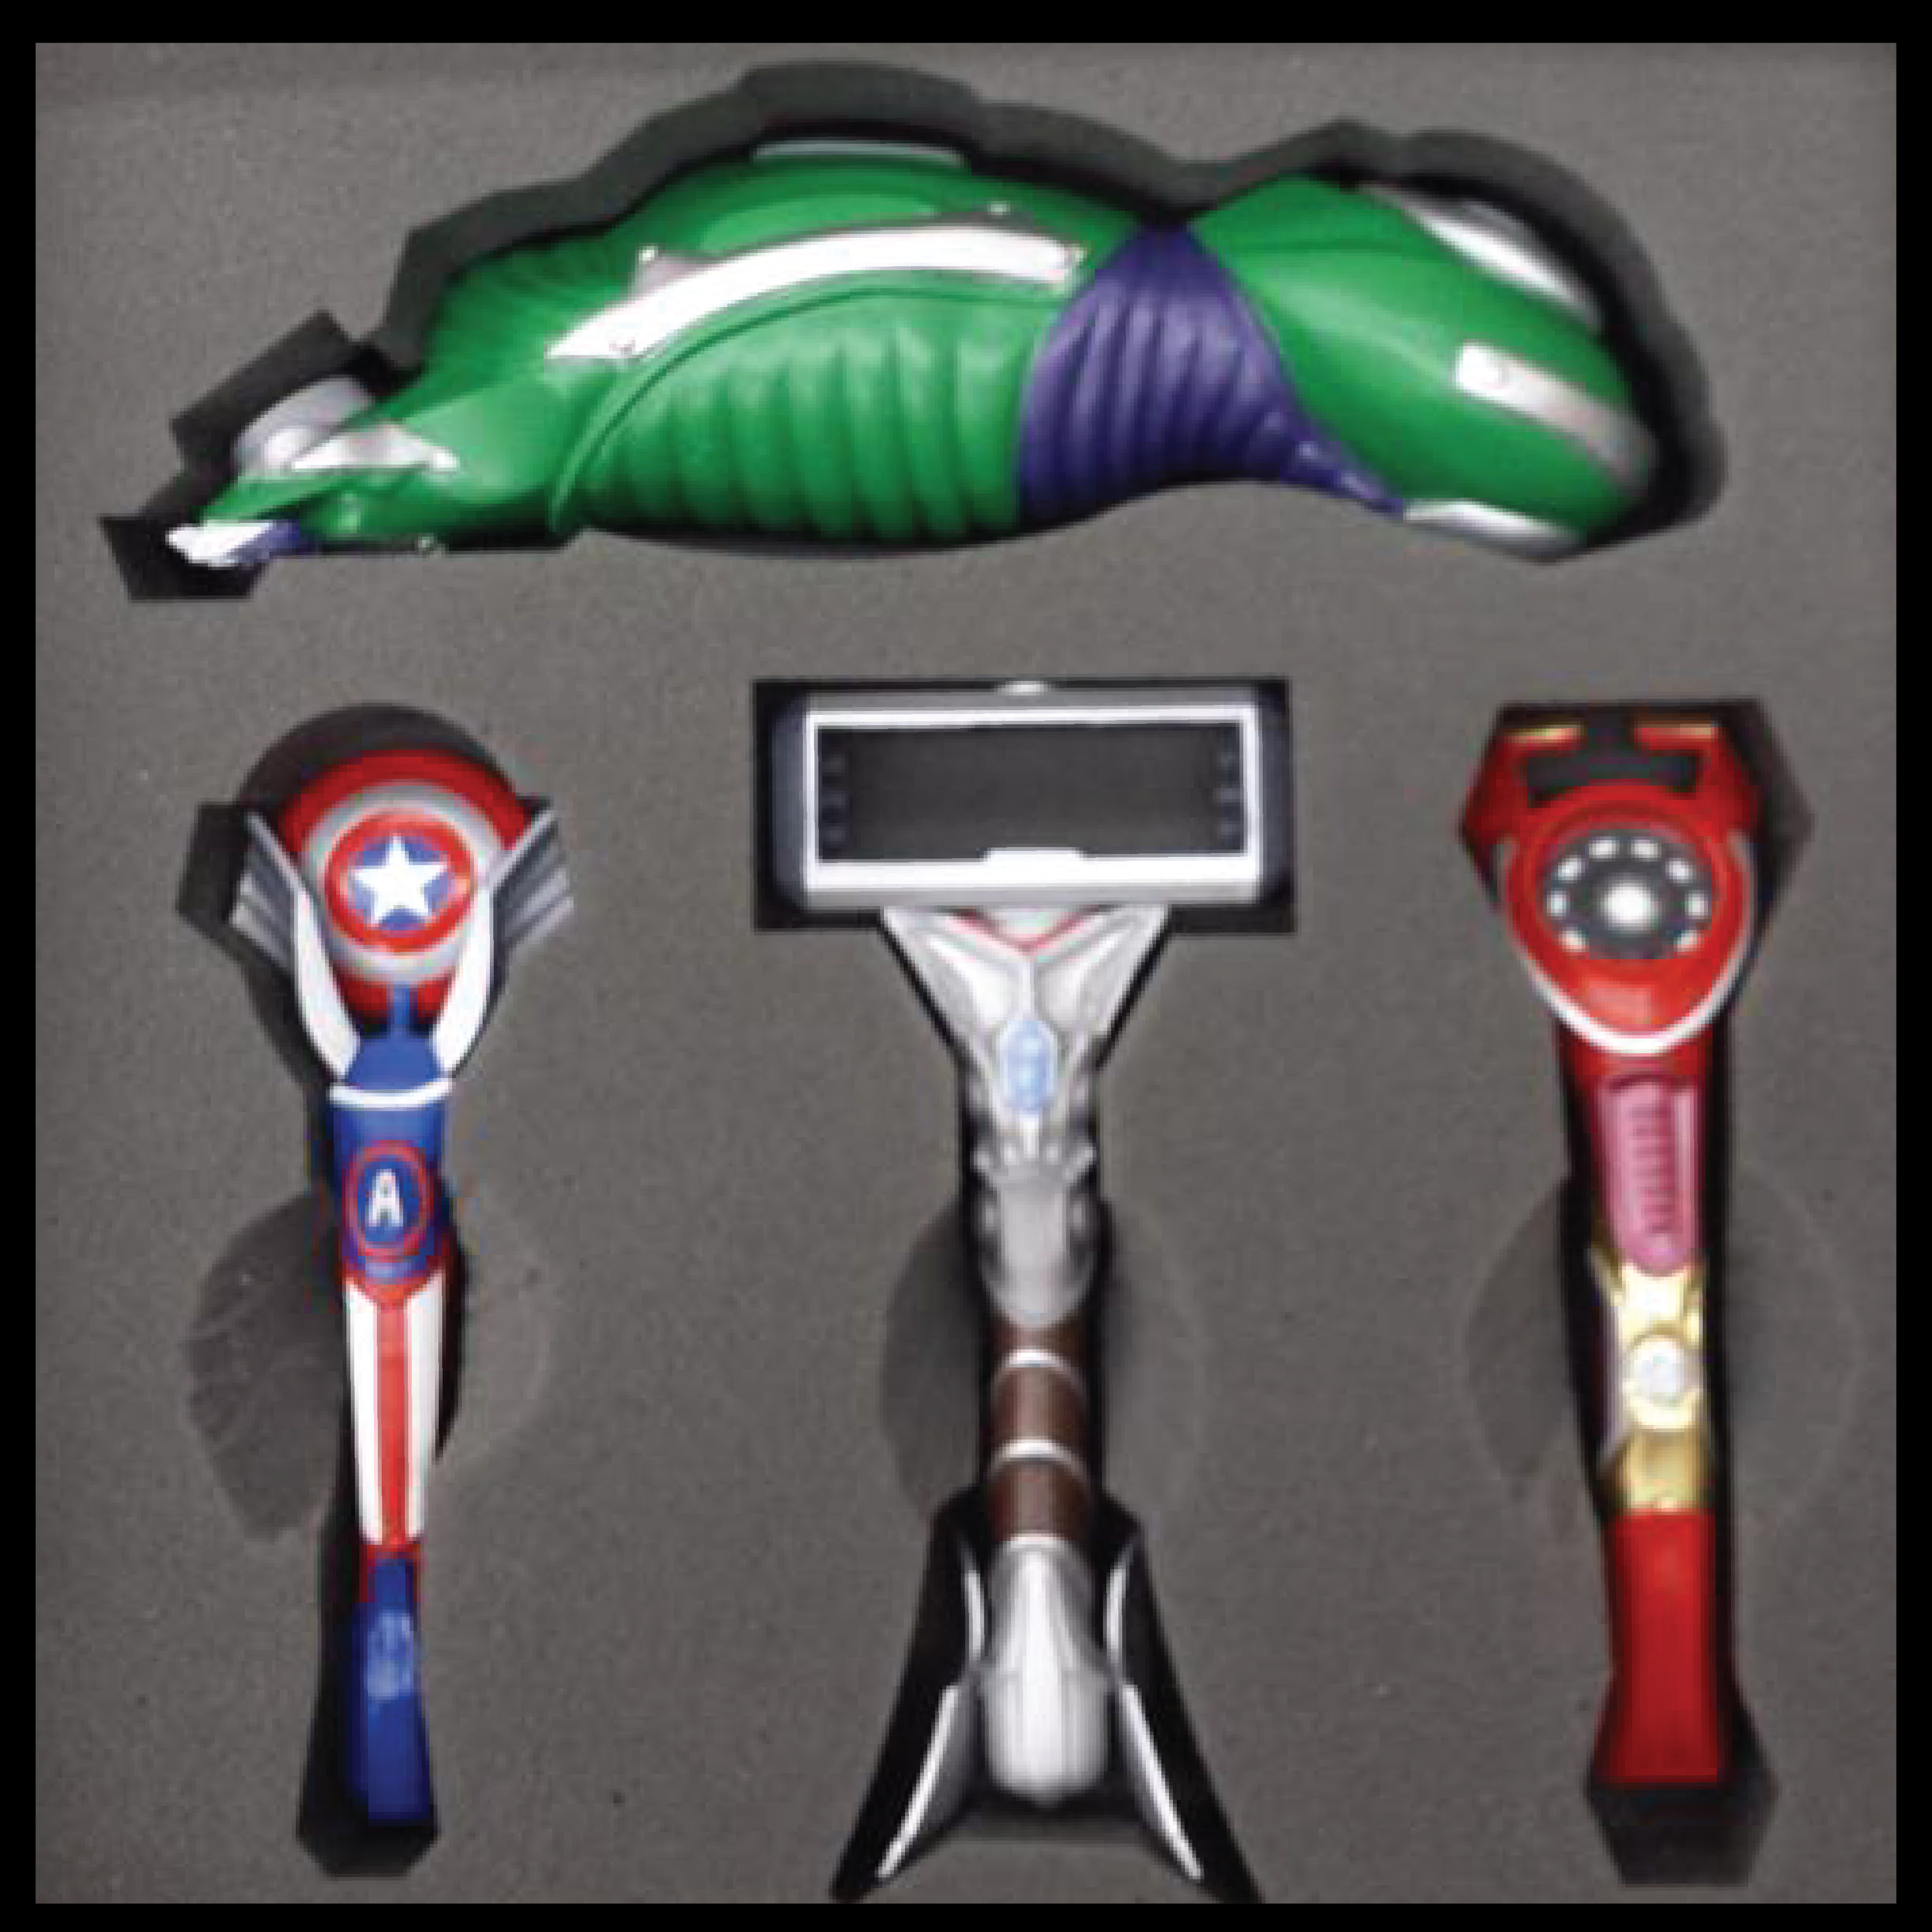
If you’ve ever tried to smooth out FDM print lines, you know how labor-intensive it is to make a screen-ready prop. With a resin printer, even with the added post-processing steps of washing and curing, finishing a resin print is so much easier in comparison. At the time though, this convenience and quality cost $2,550 and $150 for 1kg resin. 😱

Affordable resin printer?!
The Game Changer
In 2019, I picked up OG Elegoo Mars as my first printer and have been printing ever since. As a professional propmaker (Netflix, Hulu, AMC), I say confidently, that the consumer-level printers available today will produce a print equal to or better than the OG form 1. Point blank. I have upgraded to other printers since then, but the Mars printer marks when my perspective shifted. Up until that point, traditional sculpting was my jam, I loved working with my hands.
But now? if it meant all I had to do was load up a slicer, hit print, and chill?* That’s a no-brainer.
I wish I started learning digital sculpting earlier! (Learn more about digital sculpting here)
The ability to take something from the screen to something I could hold in my hands was powerful.
Now the only limitation is the size of the build plate.
Each new printer released is better than the last, so it’s a good time to be a maker!
*It’s really not THAT easy, there’s a lot to learn in terms of supporting your prints, resin temps, FEP tuning, Resin workflow, etc. (More on this in a later post) Anyone that tells you resin printing is easy is lying to you. IMO. You’ll learn as you go. Failure is a sign that you’re trying something new, and it’s super satisfying when you get it to work correctly!
Paint Test on resin Prints from OG Elegoo Mars
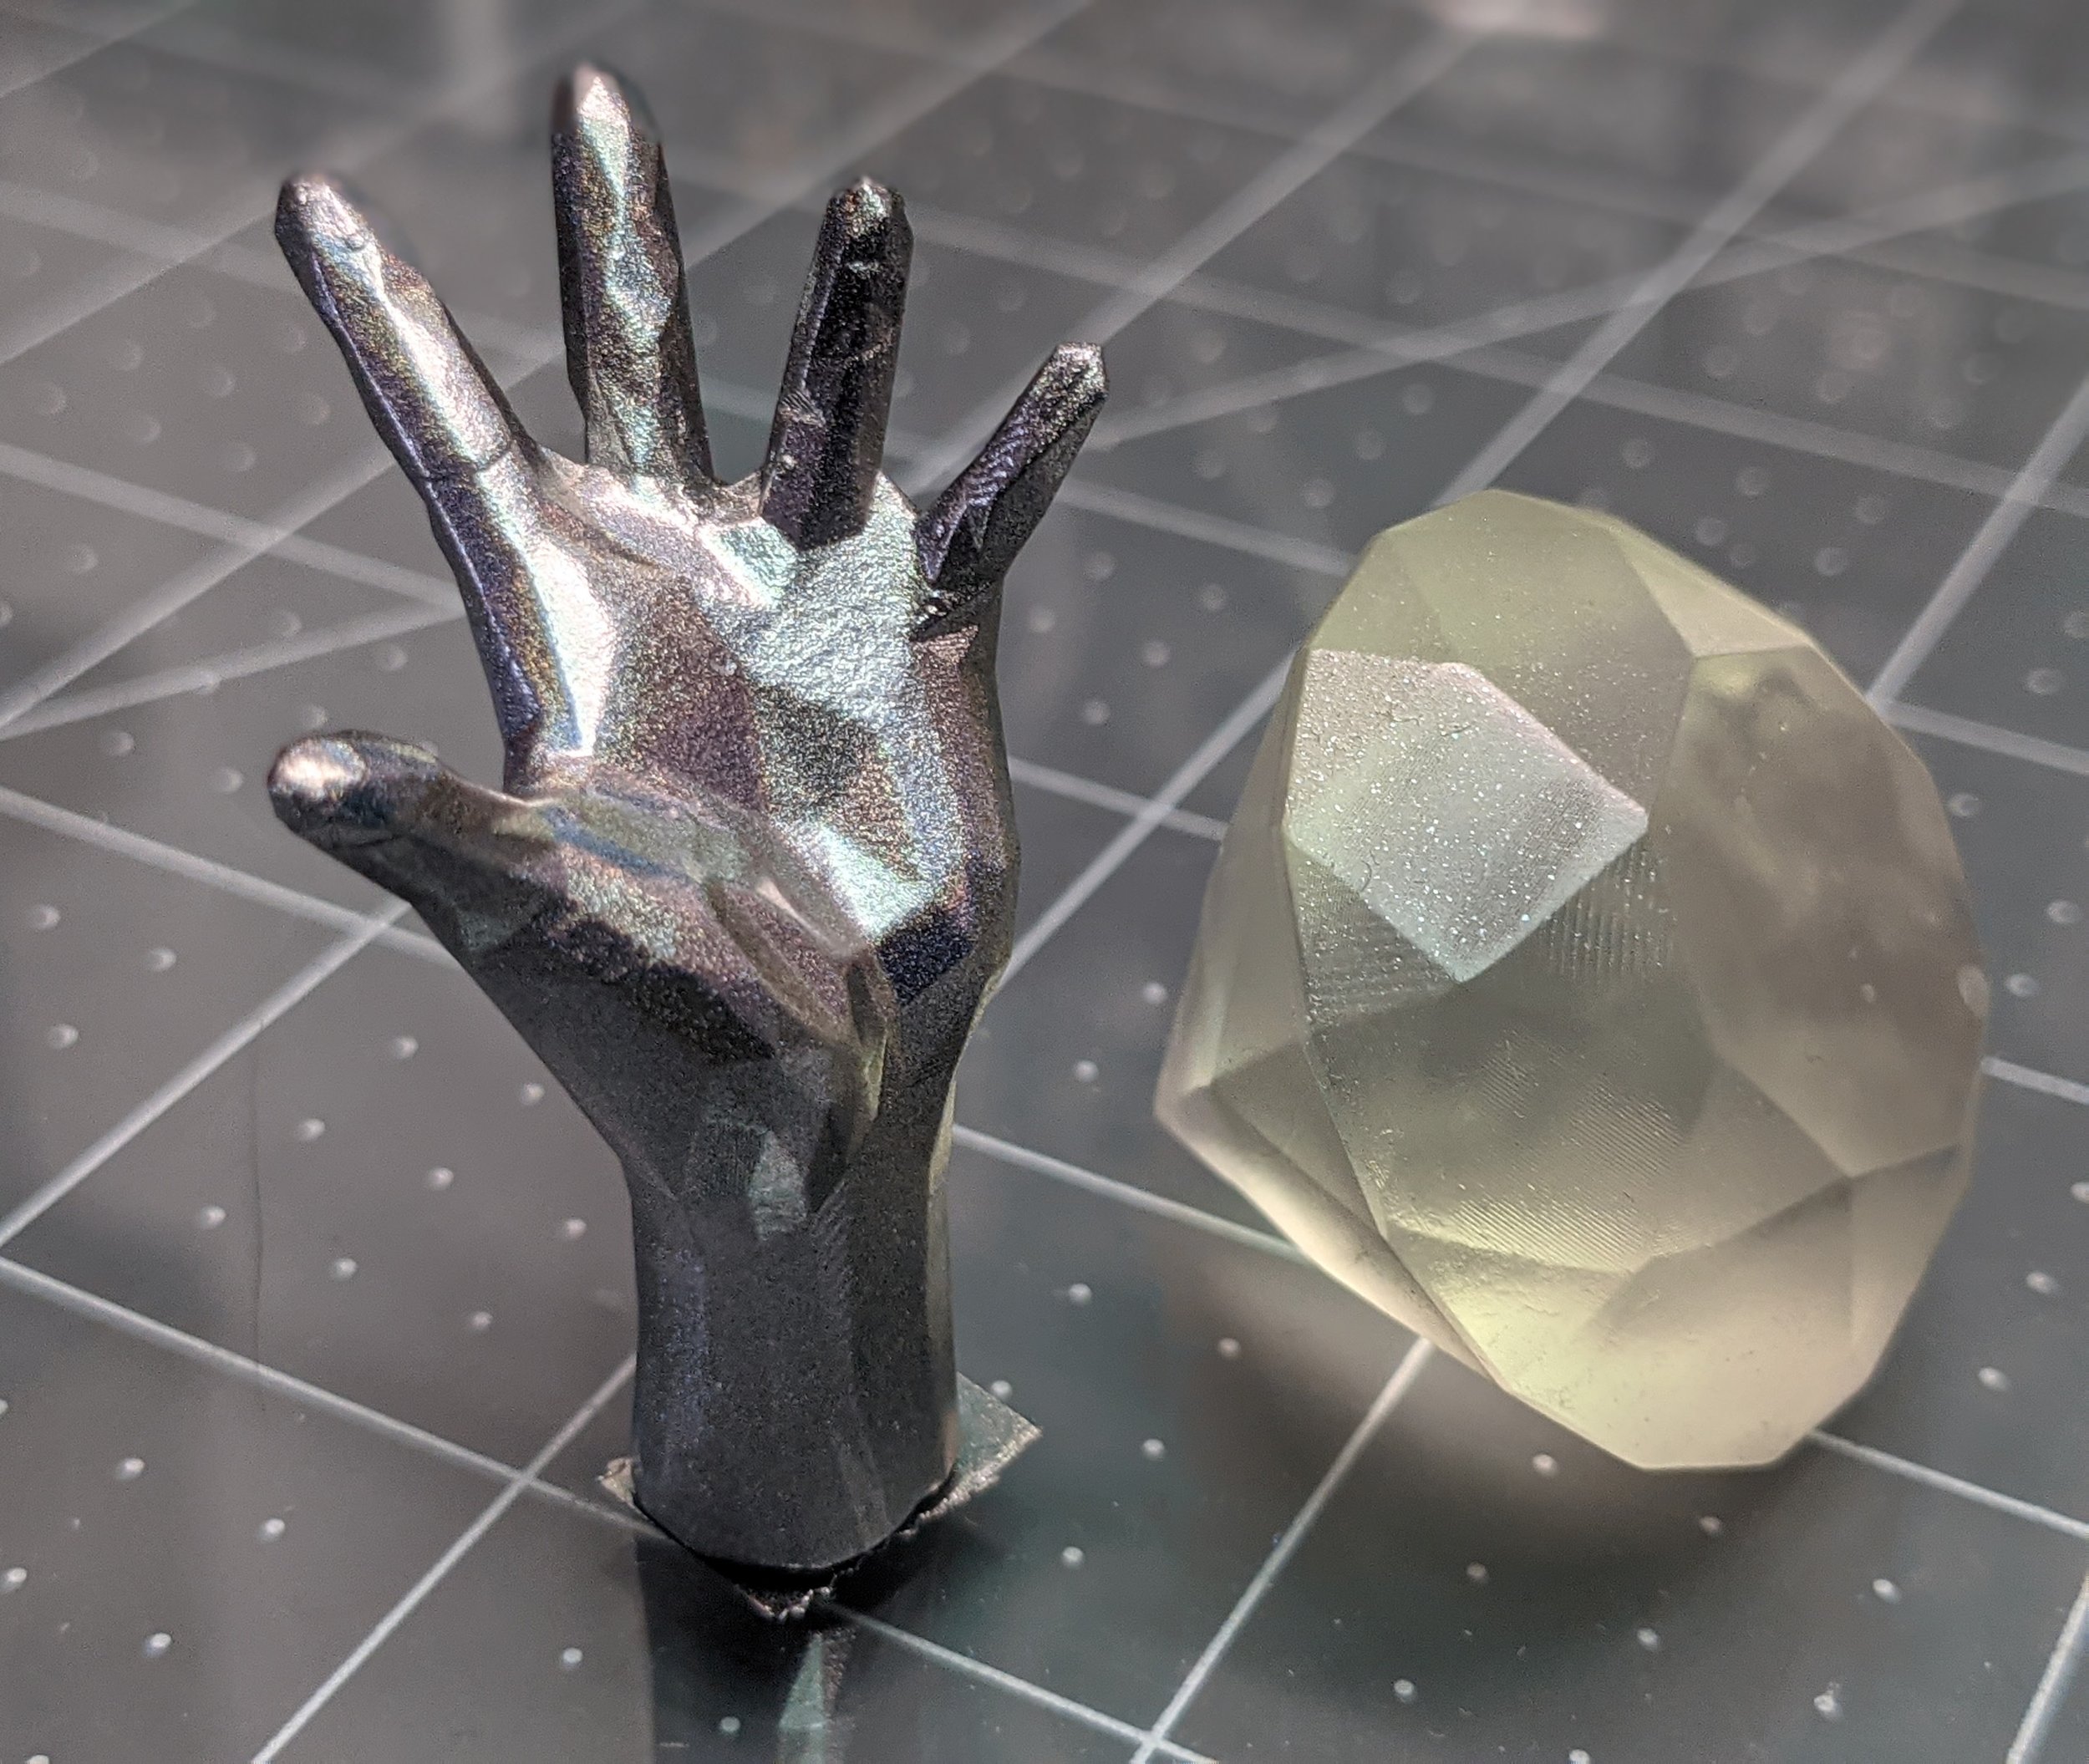
If you’re coming from FDM printing, you will love how good resin prints come out. You don’t even need to know how to sculpt, or model in 3d in order to make resin prints! There are communities of designers and sculptors that produce models you can print as well as many free models you can access. I will list them below!
So let’s take a look at what I think are the most important factors in deciding which printer is right for you. The best time to start was yesterday, and the next best time to start is today. Let’s go over, Scope, Budget, and WorkSpace.
Scope

Which one? Which one?
Lets go through your choices.
What do you want to print? And how big?
I find that it’s better to be specific when starting. Paralysis by analysis is real. If you don’t know what you’re aiming at, you’ll never hit your target. The possibility of printing all the things can become overwhelming. So I’m going to make it simple for you by only suggesting small and medium format printers. After you try it out and figure out what you like:
You can always upgrade later if your needs change.
There will always be someone getting out of a hobby while you’re getting into it and vice versa.
So you won’t be stuck if you don’t end up loving it if that’s something keeping you from starting.
There is no “Wrong” Answer.
Small Format Printer
If you like the idea of printing miniatures for D&D campaigns or want to start saving money on expanding your Warhammer armies; or maybe your uncle or father-in-law likes model trains and you want to surprise him with some resin-printed parts that the model store has but seem absurdly priced? (r/oddlyspecific) Starting with a small resin printer like the Sonic Mini 4k, or Elegoo Mars 4 could be right for you. Many of my peers swear by their Mars 3. I personally use the Sonic mini 4k (because Mars 3 was sold out at the time) and Sonic Mini 8k (this one is kind of in between sizes, smaller than Saturn 4K, but bigger than Mini 4k). I recommend that if you’re just starting, train on a small - medium format printer. It’ll be a lot easier to troubleshoot and it costs less to learn because material wastes are less.

This is a collectible I designed, and printed on Elegoo Saturn OG. The world was different in 2021, during the gamestop phenomenon and Kanye didn’t tweet those tweets yet.
Medium Format Printer
In my experience, if you want a way to do prototypes in-house, as an artist/entrepreneur, start off with a mid-tier printer. You’ll have plenty of room to play around with to create amazing prints of your designs. This is what I personally use resin printing for. I make proof of concepts, as well as small production runs.
This is also the printer size I recommend if you love sideshow collectible sculptures and want to print your own statues, or if you build model kits, ie 1:35 Tanks or Fighter Jets. I personally use the Elegoo Saturn 4K (phased this out already) and Elegoo Saturn 2 8K (also phased out) Currently the oldest generation available is the Saturn 3. You could print a half mask for cosplay with no problem on this machine. It’s a reliable workhorse for small to medium prints.
Printed on the OG Saturn. Circa Feb 2021
Fresh from the build plate before cleaning. Now I use a wham-bam plate for all my prints.
A common comment I hear from people with small format printers is that they wish they went bigger right away so they could fit more on the build plate. That’s a valid concern, but it’s also easier to make that call given hindsight. There is a huge learning curve for resin printing, and I found that it’s less frustrating to learn on a smaller machine than a larger one. There’s less resin waste for failed prints and it’s easier to clean up. As I said before you’ll be able to upgrade later if/when you find you really love this hobby.
We all start somewhere, it’s okay to go bigger after you get a good handle on the hobby. Below are some prints made by some of my 3d printing friends to inspire you to start.

David Broido’s predator diarama. Resin printed in clear on Elegoo Saturn 2
David Broido makes dioramas based on his favorite movies. He prints out the characters in resin and applies model-making techniques like grass and rocks to really punch up the scene.

Grant Cross’s creatures printed on Linant printer.
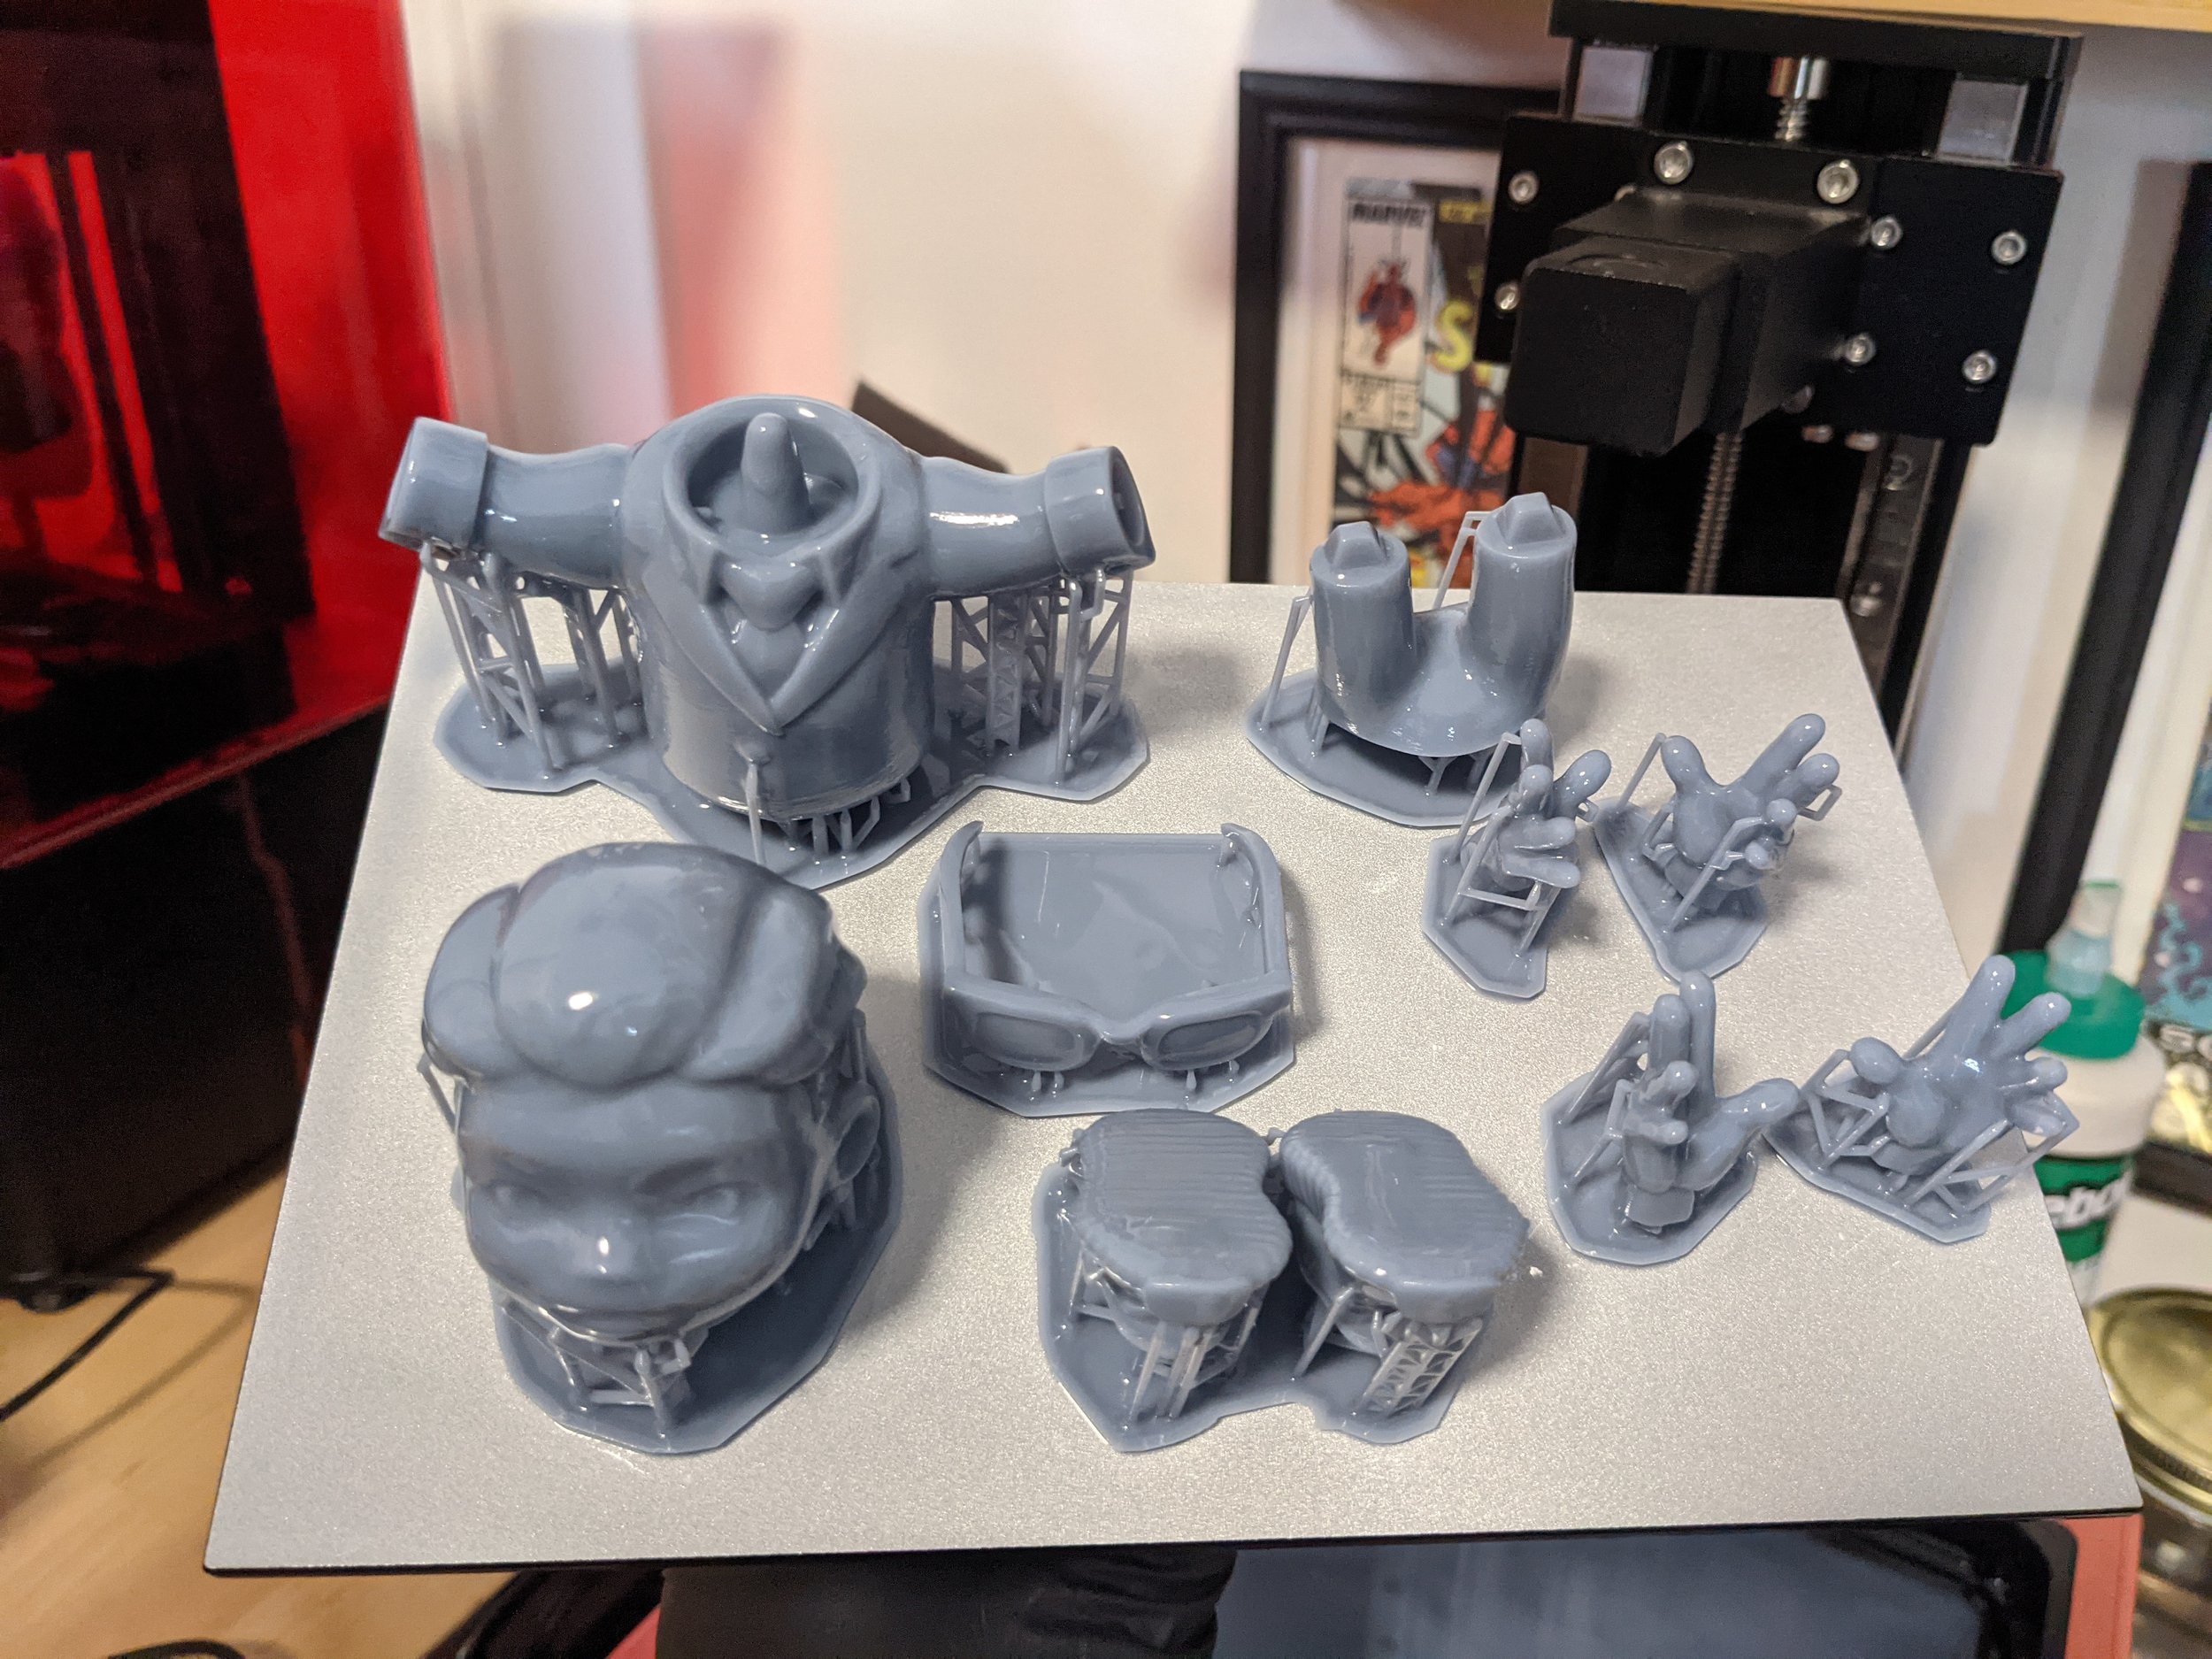
Grant Cross, uses a Linant printer, and they sculpt hyper-realistic styled sci-fi/horror art. He loves sculpting aliens, monsters, dinosaurs, and all sorts of creatures and prints them in resin, Just look at the details! Seriously check out his work if you love crazy creatures.
What about large-format printers? Honestly, if you’re reading this post, I suggest don’t even look at them for now. It’s not entry-level or affordable. You don’t want to learn on an expensive machine that uses a huge amount of resin as your first printer. Bigger prints, require more IPA to clean, and bigger equipment.
Budget
Note: Holidays coming up, Keep an eye out for special pricing as we get closer to Black Friday, Cyber Monday, and Christmas!
There’ll be special promos and sales throughout the year. Especially when they announce a new printer, the previous models will go on sale so be on the lookout!
What are you looking to spend? No really, resin printing isn’t the most affordable hobby. To avoid sticker shock later - let’s rip that band-aid off right now.

Keep in mind that if you’re new, you might spend more on the start-up gear than on the printer itself.
That $150-dollar printer deal you found could end up costing $500 when it’s all said and done.
The good news - most of that is a one-time start-up cost and it will still be useful when you upgrade your printer.
If you’re an artist, you’re an entrepreneur and the price of doing business has never been more affordable. Currently, if you want to get your ideas made into 3d prints, it would cost $500+ for a company overseas to produce a sample of your toy idea.

Now you can have a way to do prototype work in-house.
Iterate faster and conveniently without long back-and-forth emails and wait times.
You can even produce small batch runs for sales.
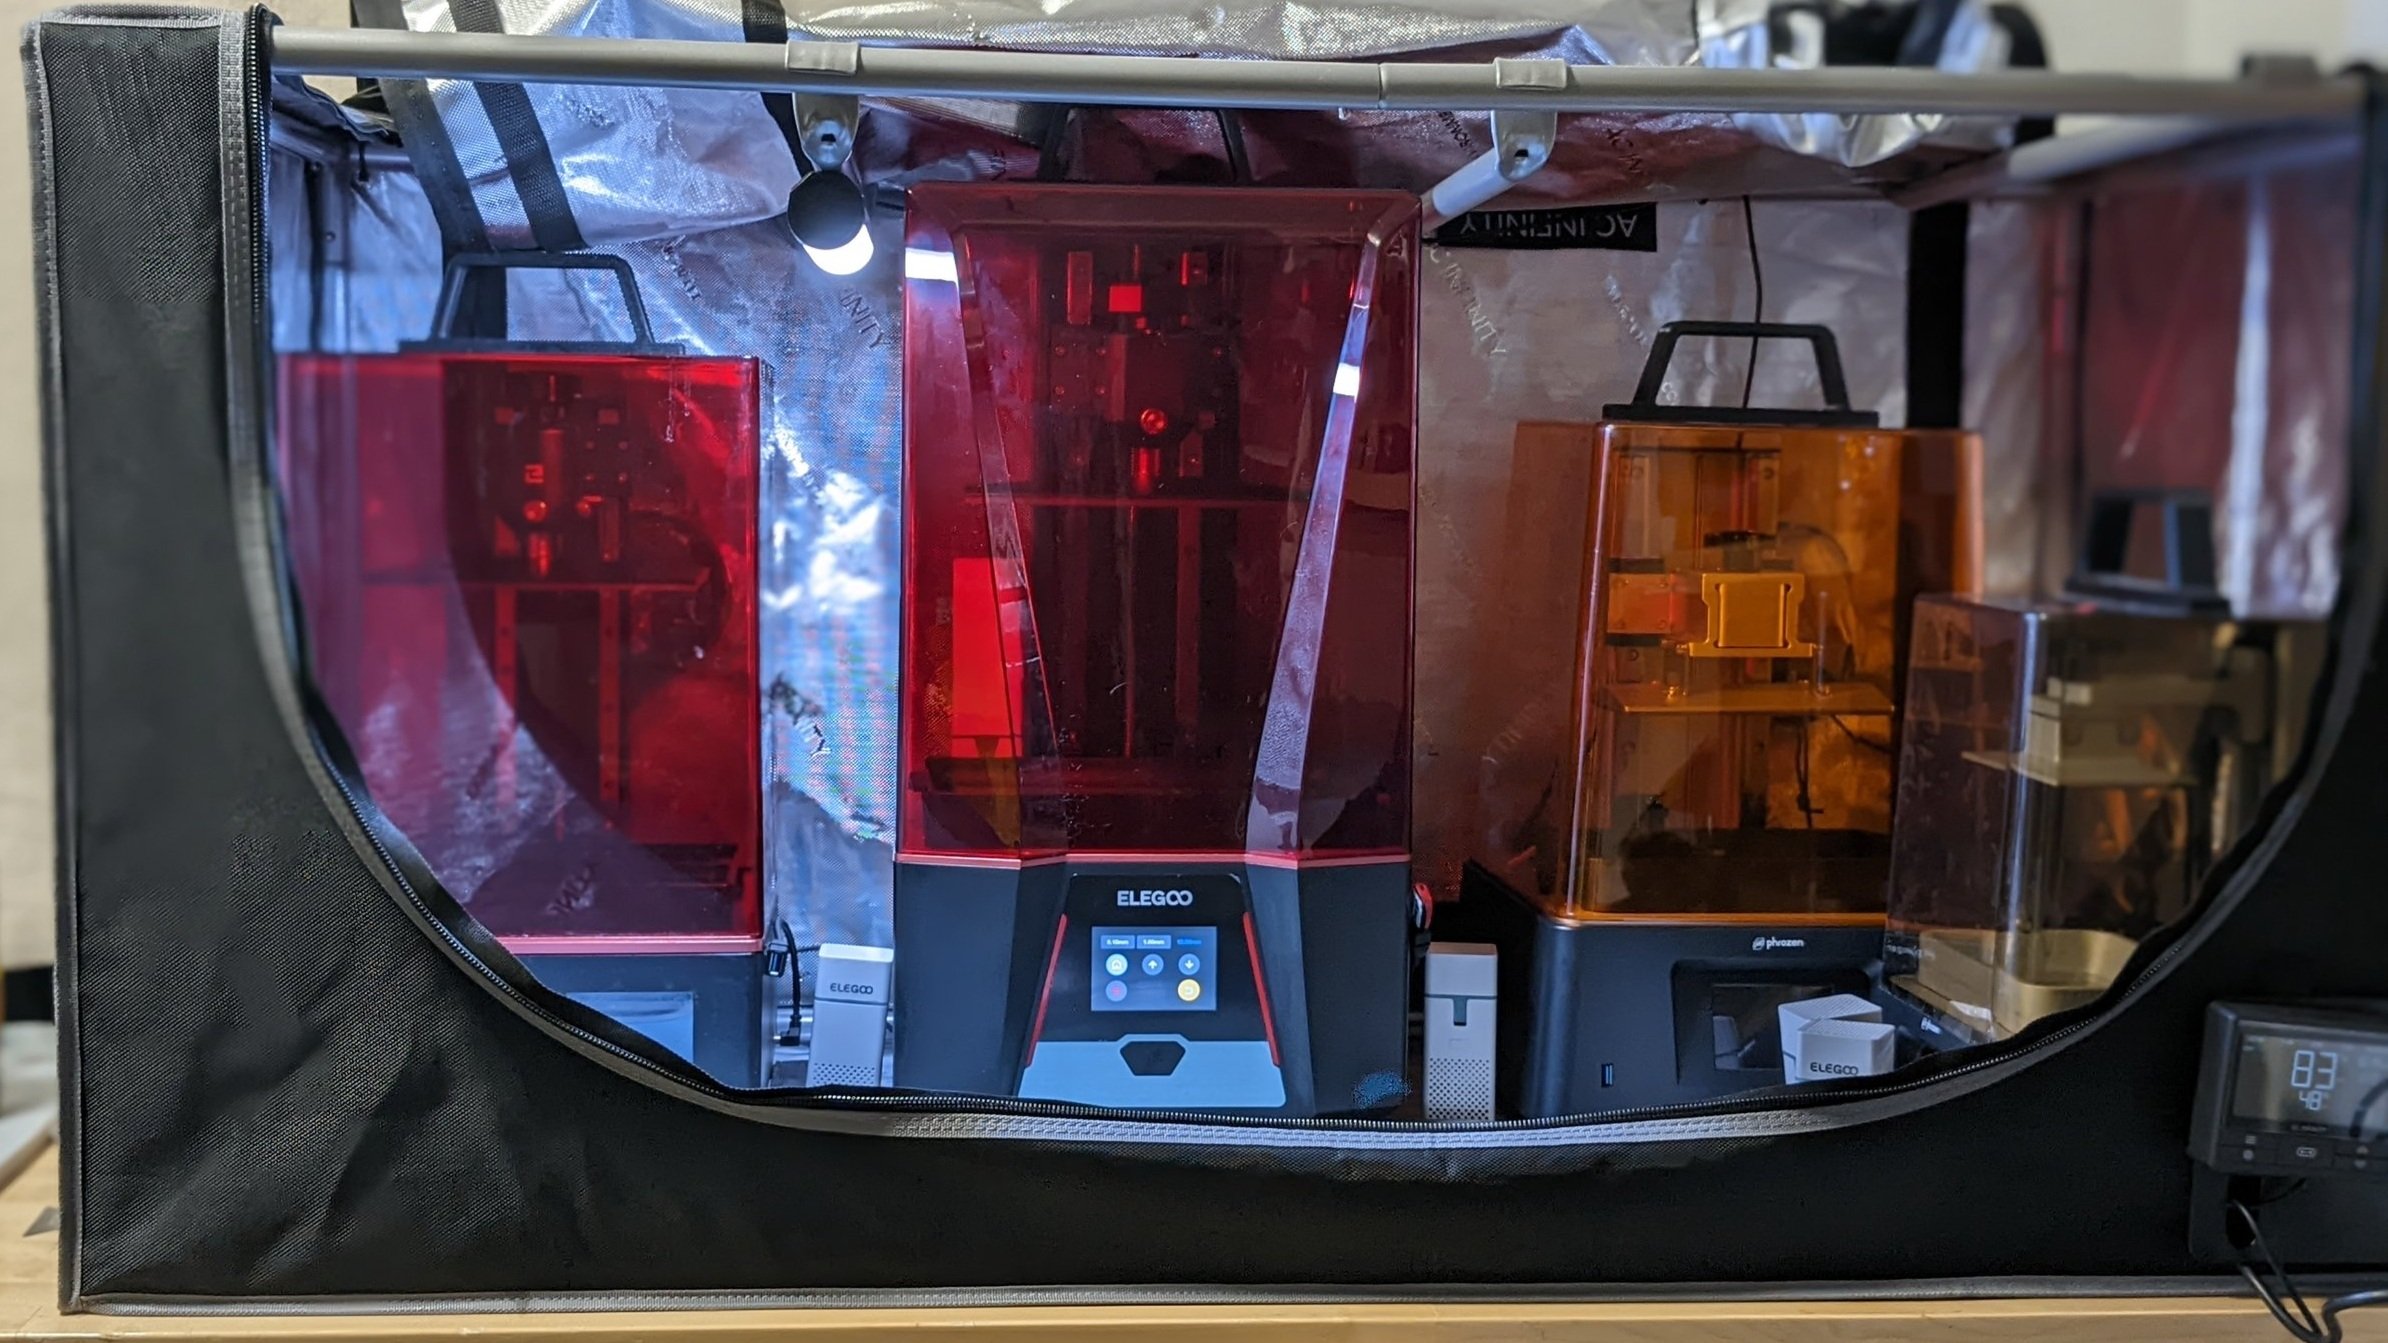
WorkSpace
Where do you plan to do your work? Resin printing takes up some space. To me, a safe workspace is not negotiable. Some people will tell you otherwise. Personally, I believe my health is worth an investment of a few hundred dollars for safety. I believe yours is too. Pick a nonhigh traffic space, somewhere, where you can ventilate and have fresh air moving through.

Stay Safe. Resin printing can be as messy as it is fun. And its really fun
You will need PPE gear for safe resin handling at a minimum and a way to vent your fumes during printing and post-processing.
I DO NOT suggest printing in a room without a window.
You will need an area to wash your prints and cure them.
Print safely without the resin fume smell!
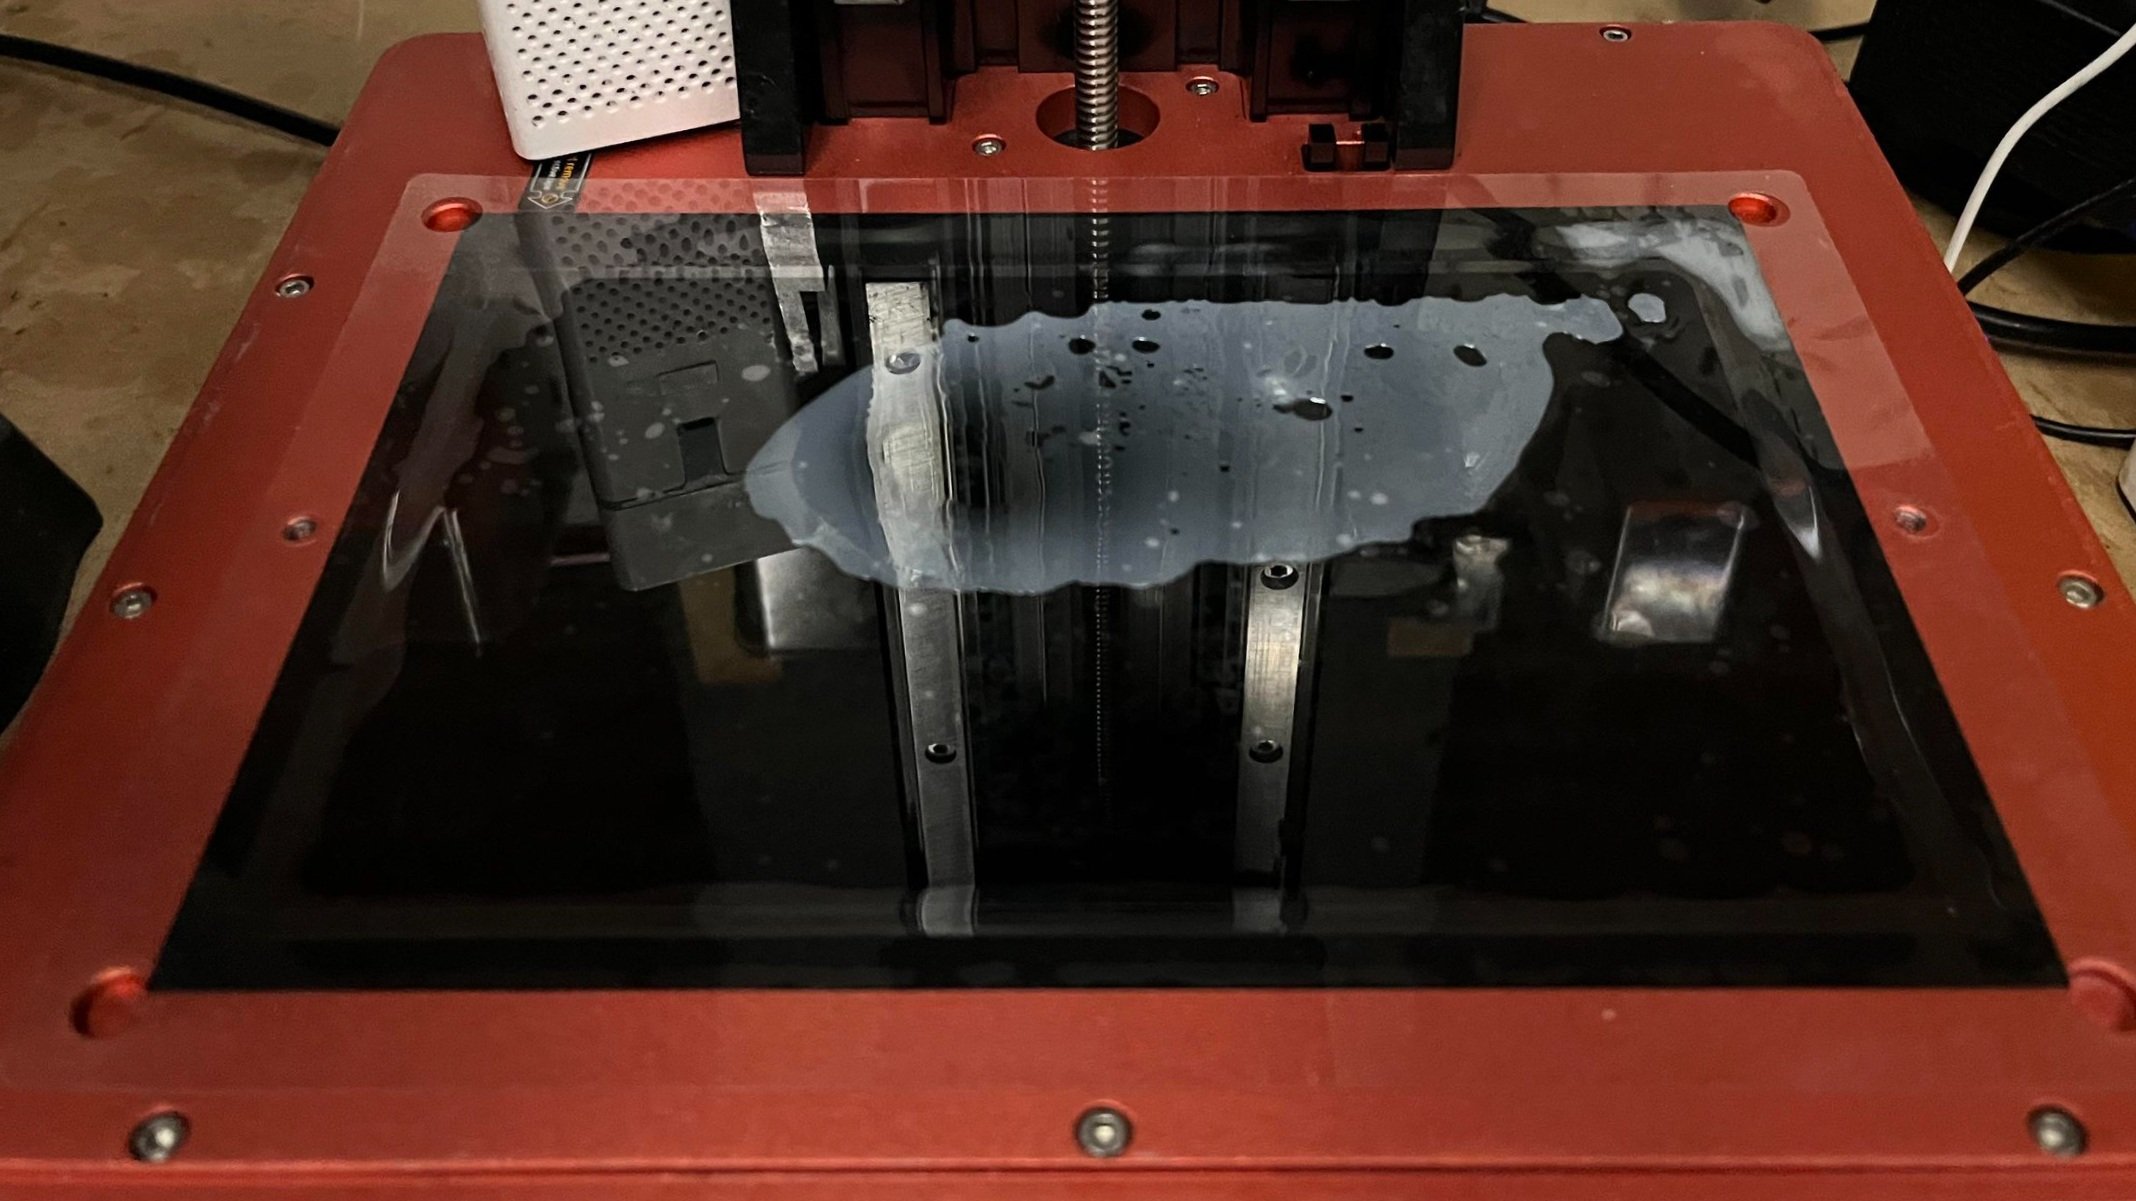
Resin printing works by UV light projected through the FEP film and curing resin in a vat, layer by layer and this produces fumes that need to be vented. Being exposed to these fumes can cause irritation to the eyes, lungs, and or skin. Not only during printing, but resin will off-gas during the cleaning process and curing process as well.
Some people think this is fine because it doesn’t bother them. If there are things you can do to avoid exposure, why take the chance? I’d be pretty devastated if I (or my family, if printing at home) got sick years down the line just because I didn’t take safety seriously all for some statues on my shelf. Full Stop.
TLDR - Your first Resin Printer: Scope, Budget, and WorkSpace
I’ll try not to overwhelm you with too many details and specs. There’s enough you’re going to have to learn. A key thing you’ll need to decide is Scope: what do you want to print? and how big? Bigger format printer = a bigger print. Budget: How much do you want to spend? Bigger Printer = More supplies. And Workspace: Where do you plan to set up your printers? You’ll need a well-ventilated workspace. I’ll share small and medium printer options and other supplies to make it simple. You can always upgrade later.
Note: Holidays coming up, Keep an eye out for special pricing as we get closer to Black Friday, Cyber Monday, and Christmas! There’ll be special promos and sales throughout the year. Especially when they announce a new printer, the previous models will go on sale so be on the lookout!
Update 4-30-2025. Every new generation release means there will be big sales on previous models. Elegoo currently has Mars 5 and Saturn 4 Ultra 16K. It’s an exciting time, for everyone especially if you’re looking to get into 3d printing as there are more manufacturers now in the game, and we as consumers get to benefit from all the upgrades! Such as auto leveling, heated vats and built in cameras for time lapses.
Medium Format Printers
Sometimes the official websites have better pricing. Sometimes Amazon does. Wherever you go, I just want you to get the best deal. https://www.elegoo.com
Elegoo Saturn 4 12k
on amazon
You could print a half mask for cosplay on this machine.
This is a reliable workhorse for small to medium prints. Save yourself some money if you don’t need the newest thing. This does all the things too.ELEGOO Saturn 4 Ultra 16K Resin 3D Printer with Flip-up Lid, Smart Tank Heating at 30℃
on Amazon
This is the New New of the Saturn line. It’s got all the bells and whistles. Heated Tank. Auto Level.
Small Format Printers
Phrozen Mini 4k on amazon
This is a well-built, good starter machine.Phrozen Mini 8k on amazon
If you are looking at Phrozen printers, I recommend checking on amazon. The Phrozen website charges shipping because they mostly ship from overseas. Their printers are built well. I haven’t had any issues with their products, so I can’t attest to their customer service.This is Phrozen’s smallest 8k printer, it’s a larger size than most small printers and a good in-between size.
ELEGOO Mars 4 Resin 3D Printer and ELEGOO Mercury X Bundle on Amazon
The Elegoo ecosystem is a great place to start your resin journey.
This bundle is last year’s Top entry-level bundle.ELEGOO Mars 4 Ultra Resin 3D Printer and ELEGOO Mercury XS Bundle on Amazon
If you want the latest printer/wash & cure bundle, these are the latest New New. It has an activated Charcoal filter.
This bundle is a New New entry-level printer/wash bundle, that has the potential for medium-format printers down the line.
They have great customer service, whenever I’ve had a problem, they just send me the part and make it right if It’s still within warranty.
Printer-related Upgrades
Wham Bam Flexible Build Plate for Resin
Honestly, I try and make a point to tell everyone to get one of these. The first thing I do for any new printer is to attach this magnetic build plate. I use the XTR For Saturn 2. and the original for the Original Saturn.Take your time putting on the magnetic part so you don’t accidentally misalign it.
Make sure you check your printer model & measurements.
Check if your printer requires a spacer for the sensor, the Saturn and Saturn 2 both needed one
Spacer link for Saturn 2 - Standard version and XTR Version available. Requires M3 x 8mm (or 10mm according to other users) I got a variety pack of m3 hex screws, so I have them when I need them)To remove prints all you do is flex the plate. and the print pops off. for small prints, you might still need to use the scraper.
I rarely ever have to level my build plate. You can swap plates so quickly if you're printing back to back, I literally pop one off and pop the next plate on, and hit print.
Works great for the wash and cure machine too and you don’t even have to remove them from the plate to wash them. Brush off your prints with IPA in a separate container first to get off most of the resin before you put the whole plate into the wash and run it for 4 - 5 minutes.
This is a great quality-of-life upgrade for removing prints off the build plate.
This Screen protector PSA brought to you by u/nay7uk on r/elegoosaturn
Clear Screen Protector for Resin 3D Printer. on amazon
Screen protectors are more affordable than replacing the whole screen. Make sure you pick the one sized for your printer.
This is to protect your screen in case of a resin leak.
Resin Printers themselves are consumables. The screens have a limited print life and will eventually need replacing. Fep/ nFep sheets will wear out as well. You probably won’t need to replace them for a while, but it’s good to know.
These are specific to the printer, so refer to your specific manufacturer when buying extras of these.
Mono screen - After a few thousand hours of use your screens will start to fail, I haven’t had this happen yet.
Fep Sheets - Keep extra sheets because you will probably get a puncture sooner than later. You could also tape one to the screen with Kapton tape just in case of accidental resin accidents. as a makeshift screen protector.
Resin Vat - If you like to swap colors quickly, get another vat. I find this extremely helpful to have more than 1 vat. I use this to diagnose if a fep needs to be swapped out, by checking with another vat.
Resin

Credit: TableFlipFoundry
Yes, you need resins to start resin 3d printing. Here are some that I use and why. All resins will need to be tuned before getting your best results. I use other resins as well, but to start learning - these are very good as a base set.
Print calibration tests and dial in your settings for every resin you use and save them as profiles in your slicing program, either lowering or adding time to see which comes out better. There are so many different tests. A lot of them are hard to read. If you’re doing mini-printing try the cones of calibration from TableFlipFoundry. They’ve made a great video and start-up guide.
ELEGOO ABS-Like 3D Printer Resin Grey on amazon
I don’t bother using standard resin because it’s very fragile. ABS-Like is tougher than “standard” resin.
This is what I consider to be a regular degular resin that you can use to print.
ELEGOO ABS-Like 3D Printer Resin Clear on amazon
It shrinks more than Siraya Tech so it’s not as dimensionally accurate.
This is an economical, clear resin I use to mix pigments into for printing in base colors for painting. It does tend to lean yellow but you can tint it with a tiny bit (think toothpick tip) of purple alcohol ink to tone it down. I will write a dedicated post to this later if that’s something that interests you, but the basics are just to put a drop of alcohol ink to achieve tinting, you can also apply it post-printing using an airbrush for even coating.
Sometimes siraya.tech has promo deals and bulk pricing.
Whatever you decide, I just want you to get the best deal.Sirayah Tech Fast ABS-Like on Siraya.tech | amazon
Comes in a bunch of colors, Grey, Navy Grey, Creamy, White, Smoky black, Green, Mecha White.
This is a good starter resin and prints fast.Siraya Tech Blu Tough on Siraya.tech | amazon
Comes in Emerald Blue, Clear V2, Obsidian Black, and Nylon Black
It is the only resin to date certified to be biocompatible after you follow their post-curing procedures. So if you make jewelry, this one would work.
This resin is strong, usable for functional parts, and has good dimensional accuracy.Siraya Tech Tenacious Flexible on Siraya.tech | amazon
Comes in Clear (yellowish tint) and Obsidian Black
This one I use this one to mix into other resin so they can have some flex - like for swords, other sticky outie parts, etc. so it’s great for miniatures that see tabletop action.
Addendum: Some people like water-washable resins. In the past I’ve tried them,. But not anymore because the prints tend to be more brittle, and if not properly cured, can crack. This also produces a lot of wastewater which takes a long time to evaporate and dispose of properly, and the screws in the cleaning vats tend to rust if you keep them filled with water. If you mastered a good workflow with water-washable resins, let me know - I’d love to share it with the community!
Wash and cure Machines
Some people will tell you that you can use a pickle jar and that you don’t need to buy anything special, etc, etc. But I don’t like the idea of spending effort and time on a 10-hour print to just mess up the cleaning part and potentially ruin all that work.
Mercury Plus 2.0 on Amazon
This small 2-in-1 wash and cure station is budget-friendly and has a small footprint.
If you plan on making small parts/prints, minis, etc this unit is a small entry-level option.
This model is good for Small format printers.Mercury X Wash and Cure on Amazon
If you plan on making medium - large size prints (in multiple parts) This one is the current largest option for wash and cure. I have this one and haven’t upgraded it because I have a UV flashlight already. If you don’t have a flashlight I recommend getting the one below.Mercury XS Wash and Cure on amazon
Same as above unit size-wise and comes with a UV wand for curing inside prints. (currently 4/30/25 is on sale, for $179)
This model is good for Small and Medium Format Printers.Isopropyl Alcohol 99% (pack of 12 -16 oz bottles) on Amazon
Poke a small hole and use it as a squirt bottle to help get into deep print crevices. (Wear goggles and a respirator)Isopropyl Alcohol 99% (4 gallons) on Amazon
The Mercury X wash bucket will hold 7500 ML approx 2 gallons.
Buy this in bulk. You will use it. Refer to Resin Safety 101 for disposal.
It’s still one of the best deals IMO, $68 for 4 gallons delivered to your door.
This is for washing your prints and cleaning off resin spills on your tables, etc.
Post-Processing Tips:Trim supports before curing; they are softer and come off more easily.
Pre-washing your prints in a separate container (brush them with an old toothbrush first) before running them in the wash cycle helps get rid of most of the resin.
Water cure your prints in a large jar with water to cure your prints faster and prevent warping!
Workspace Supplies
Color Code your tools for an easy way to remember what is safe and unsafe to touch.
🔴 Red for Stop/Danger
🟢 Green for Go/Good.
Lunch trays on Amazon
Red lunch tray - For uncured prints, Red for Stop/Danger
Green lunch tray - For cured prints, Green for Go/Good. “
This is where you put your prints down so you can clean or for drying.Small Tongs With Silicone Tips 7 Inch on amazon
Comes in a 3-pack, Red, Green, and Blue.
Avoid sticking your gloved hands into chemicals.
Red for uncured resin parts
Green for cured resin parts.
Blue for the kitchen?
Don’t get them mixed up! 🤷
This is to pick up your prints during washing and curing so you don’t have to use your gloved hands.5 Inch Kitchen Funnel on amazon
This is for use with paint strainers so you can filter out any resin bits to prevent holes in your FEP sheet.Paint Strainer Mesh Funnel, 190 Micron - 250ct on amazon
This is used for filtering resin bits out with a metal funnel.Gorilla Grip Waterproof Slip Resistant Silicone Pet Mat on Amazon
If you want anything other than grey, these come in a lot of fun colors. You could do red and green too if you’re OCD and like to match match. Leave them out in the sun to cure resin and then peel it off for easy disposal. I like these because they come in all different sizes and I have found them to be less expensive than those that are rebranded for 3d printing.Under Sink Mat, on amazon
Heavy-duty large-size (34”x22x0.67") mats. Come in white, grey, and beige.
These are for putting under the printers in case of spills and your work area to protect your tables.Black Disposable Nitrile Industrial Gloves
5 Mil Medium Size on Amazon | 5 Mil Large Size on amazon
Handling uncured resin WITHOUT gloves is NOT RECOMMENDED.
This puts a barrier between the resin/chemicals and your hands.Toolbox Shop Towels on Amazon
I cut them to get 4 out of 1 sheet and use smaller sheets for little spills. They work better than using regular paper towels IMO.
This is for wiping off excess resin from gloves and lining my lunch trays and cleaning up spills.
Optional Extras

Your first Resin Printer: Scope, Budget, and WorkSpace:
In my experience, resin printing is a learning process. It’s hard to learn everything. This is enough to get you started. Just know, If you’re failing, that means you’re trying something new and that’s very exciting/frustrating. The struggle makes the victory all the sweeter. Trust the process.
If you found this guide helpful, please share it with someone else who could use it!
In the meantime, check out more blog posts below.
Until next time, Stay creating.
Ray @AsianJoyCo

Cleaning Used IPA
You got dirty IPA, now what? Find out how to clean it here.
New to digital sculpting? Learn about a few different programs you can use!
What kind of tablet is right for you? An intro to the tools for digital sculpting and modeling…

Quality of Life Upgrades for Creatives: Part 1
You only got one body for the rest of your life. Treat yo’ self!